
The build path
Build your own AI second brain
An AI second brain (some call it a personal AI operating system) is simply a folder of files plus an AI agent working inside it. It remembers what you feed it: notes, documents, projects, your way of doing things. It connects all of it, does real work on your behalf, and the longer you work with it, the better it knows you.
This page is the whole build, free, in the order I’d do it again. I’m a science writer, not a developer. I built mine in April 2026, the month Andrej Karpathy’s LLM wiki idea went viral, with no clue what I was doing. Now I run my working day on it. If you don’t know what you’re doing either, that’s okay. I was there, and at each step I’ll tell you what actually matters.
The build at a glance
Five short steps take you from nothing to a working wiki. After that you’re never done; you do three things forever.
Step 1: What you need · a computer, a Claude subscription, Claude Code, a markdown viewer
Step 2: Install Claude Code · download, sign in, pick a folder, trust it
Step 3: The paste · two pastes build the naked wiki
Step 4: Make it yours · feed it your files, add three starter upgrades
Step 5: Use it · talk to it, correct it, let it learn you
Then, forever · populate · maintain · connect
Common questions
Why free? Because I built mine for free, and charging for the same information doesn’t feel right. And because I didn’t relate to the people building these systems. I’m not a tech person. There’s plenty to learn from them, but I was never going to learn how to make this thing useful for my kind of work from them. So this is the translation into practical use, for the rest of us. Buying a set of mystery files somebody else built doesn’t speak to me either: you’ll have to learn how it works anyway. Learn it building your own, and take from my posts exactly the features you want.
Step 1: What you need to build an AI second brain
You need four things: a computer you can install software on, a paid Claude subscription (as I write this, Claude Code comes with the Pro plan and up, not the free plan), a way to run Claude Code (I recommend the desktop app), and a way to read markdown files. I recommend Obsidian, which is free.
- The computer. Anything you can install software on. I use a MacBook Air; I’ve also set this up on a PC.
- The subscription. I started on Pro and took breaks when I reached the limit. Now I’m on the regular Max plan and bump up a tier when a big month needs it. You can adapt the plan to the month you’re having. Just switch your subscription. Prices change; check Claude’s pricing page.
- Claude Code. You can run Claude Code three ways: the Claude desktop app, the terminal, or inside a code editor like VS Code. I like the desktop app: it looks like a chatbot and does almost everything I need. I keep the terminal version installed too, and on the day it’s needed, the app tells me exactly what to paste there. (Weighing the surfaces? I’ve written about that choice.)
- A markdown viewer. I use Obsidian. You point it at a folder on your computer, and that folder is your vault. In our build it’s the same folder Claude Code works in. Obsidian shows you the tree of files inside it: click one, read it like a normal document, edit it right there. Its graph view even draws you a map of everything in your wiki and how it connects.
Step 2: Install Claude Code
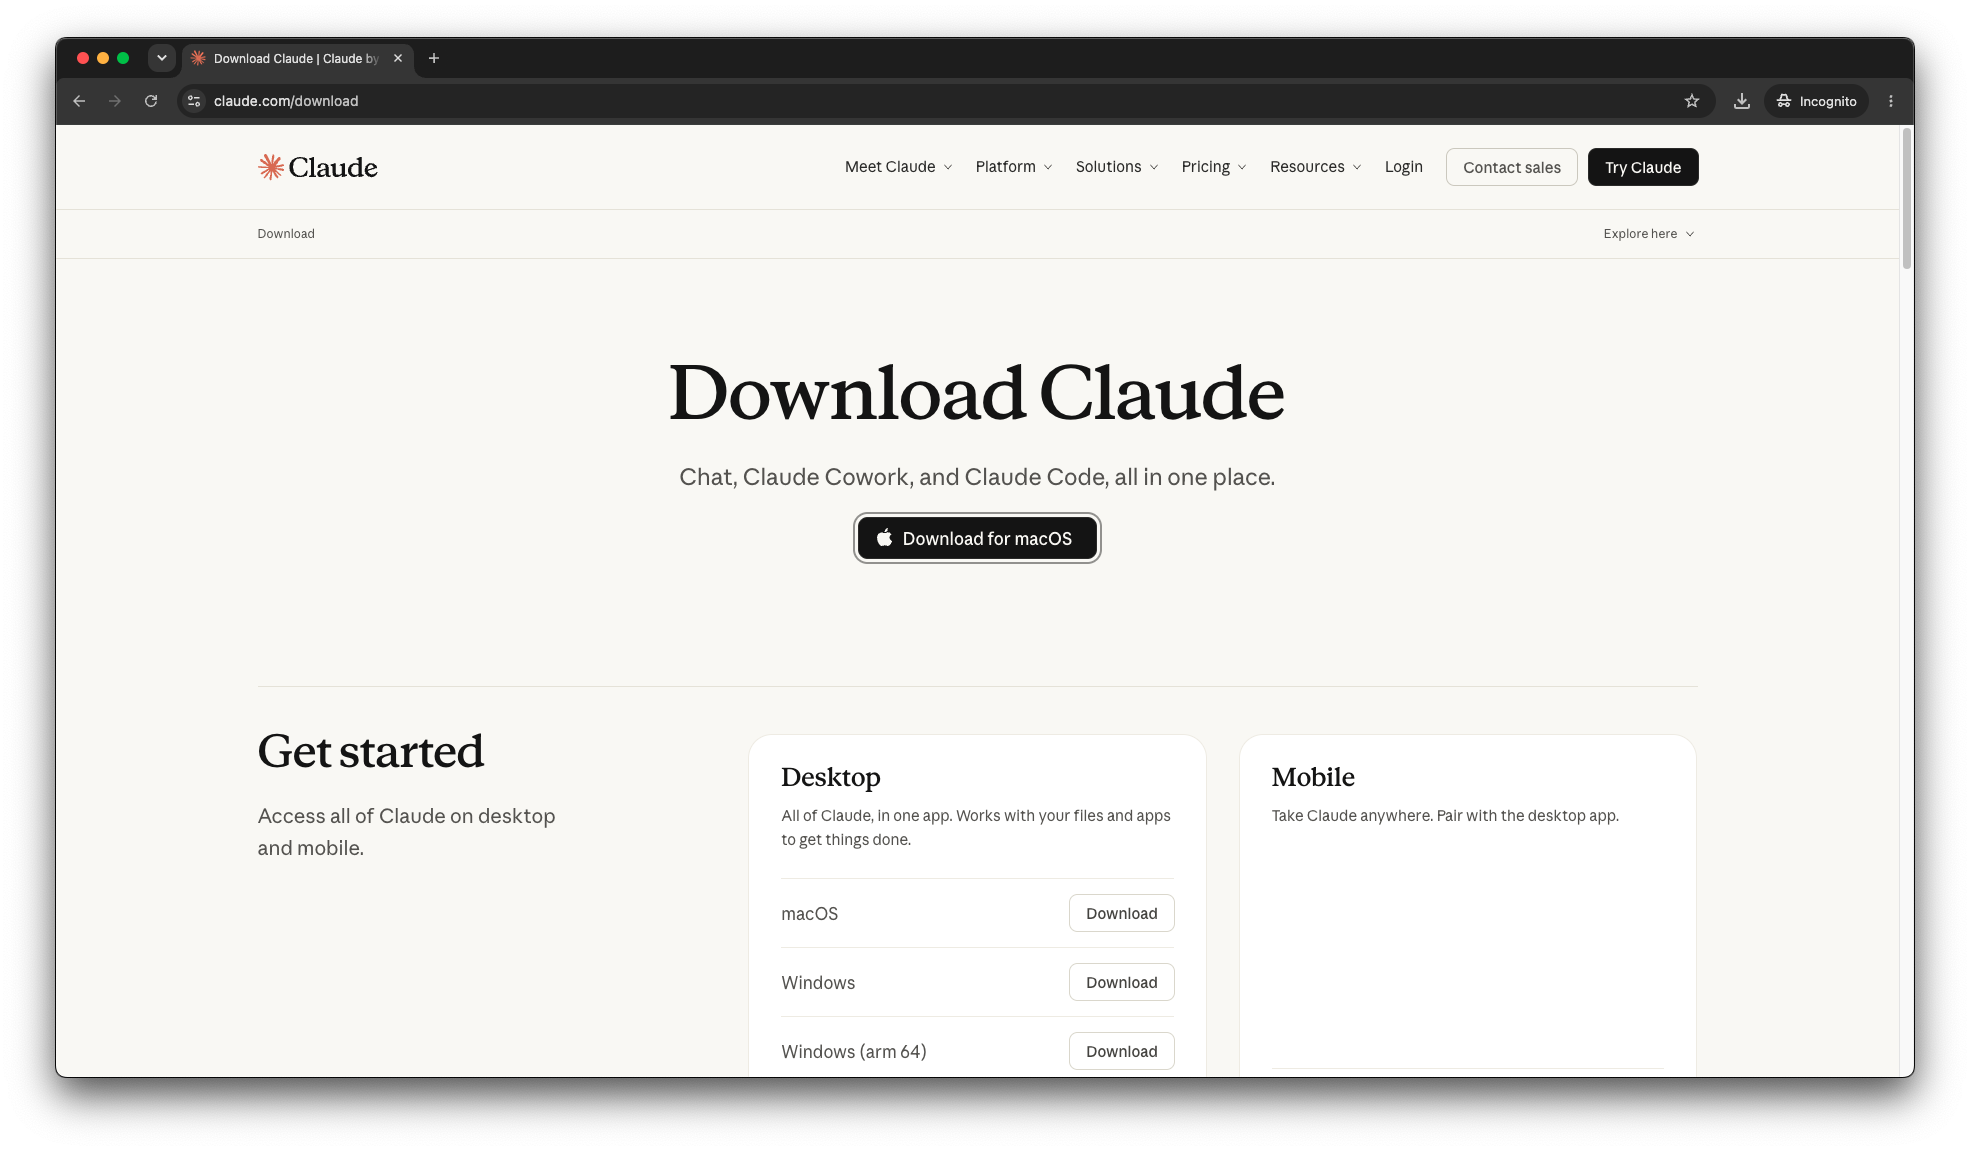
Installing Claude Code takes about five minutes: download the desktop app from claude.com/download, sign in, point it at an empty folder, and tell it you trust that folder. The screenshots show a Mac; on a PC you follow the same steps through the usual Windows prompts.
- Download the app from claude.com/download. Mac and Windows both live there.
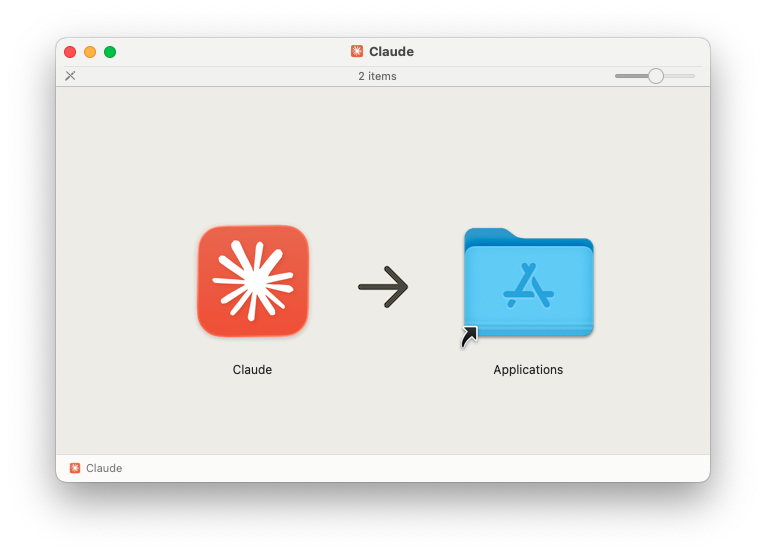
- Open the downloaded file. A little window appears with the Claude icon and an Applications folder; drag the icon onto the folder. That’s the whole install.
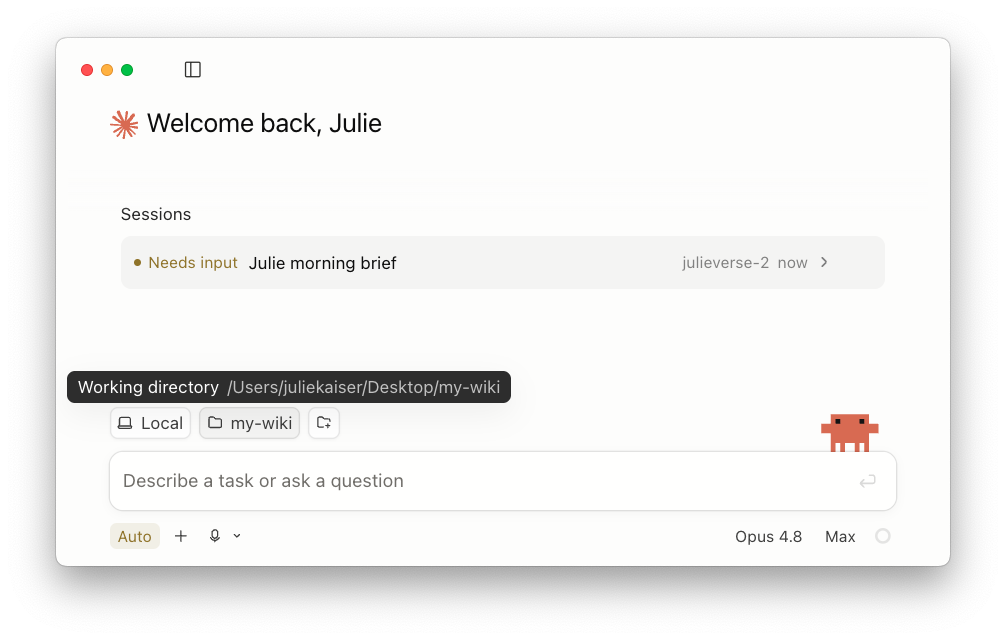
- Open the app and sign in with your Claude account.
- Make a new empty folder and name it something like my-wiki. In the app, a small chip under the message box shows the folder Claude will work in. Hover it and you see the full path; click it and choose your new folder. (A first launch may ask where to work before you see the chip; same choice, same answer.)
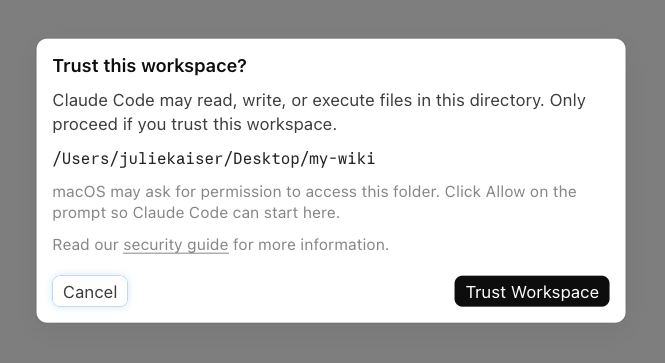
- Claude asks: “Trust this workspace?” It’s checking you’re okay with it reading and writing files in that folder. For the empty folder you just made: Trust Workspace. If your Mac adds its own “allow access?” question, that one’s Allow.
When it asks permission. Claude checks before it acts: “Can I create this file? Can I run this command?” At the beginning you won’t understand half of it, and clicking allow on things you don’t understand is not a security system. The real gate is what you feed the thing. Don’t download files willy-nilly and hand them to an agent that acts on your behalf; take instructions from people you trust, and read what you’re handing over. Everything on this page is plain text you can read first. Beyond that: leave the setting on Auto (the small chip under the message box, bottom left in the screenshot above), and when a request confuses you, ask “why do you need that?” It answers in plain words. The other controls down there, like the model name, are fine as they are on day one.
Step 3: The paste that builds your wiki
You build the wiki by pasting two things into Claude Code: an instruction saying you want to build what Karpathy described, then Karpathy’s own text (archived copy, so you can see it’s really his). The agent does the rest.
Both pastes come in one plain-text file you can read first: wiki-kickstarter.txt. It’s my short instruction plus Karpathy’s full text, quoted with attribution, and his note says the idea file “is designed to be copy pasted to your own LLM Agent.” That’s exactly what you’re doing.
What you get is basic by design. Karpathy again: “This document is intentionally abstract. It describes the idea, not a specific implementation.” Out of the box you have a raw folder for the stuff you drop in, a wiki folder the AI writes, an index that catalogs it, and a log of everything it did. An empty shell, on purpose. Step 4 is where it becomes yours.
The first thing I put in was everything from a class I’d made about the science of home canning: video transcripts, landing pages, emails, all of it. I said: ingest it, show me what’s there. My content came back as wiki pages with hyperlinks between them, topics connected the way I’d always seen them in my head but had never been able to look at.
Step 4: Make it yours
A fresh wiki knows nothing about you, but that’s easy to fix. Put files into the raw folder (drag them in, or clip pages straight from Chrome with the Obsidian Web Clipper extension) and say in the chat: “There’s new stuff in the raw folder. Ingest it into the wiki.”
The first file. Start with a file that says who you are, what you do, and what this wiki is for. You can fill out my question file: first-file-template.txt. Dictate your answers into it. Talking is the most efficient way to work with this tool, and if you’re not eloquent, that’s absolutely fine: talk in circles around your answer and Claude will figure out what you mean. If not, you can clarify. I see Claude as a translator that turns my rambles into something that makes sense.
Something you should know about dictation. I dictate everything. The Claude desktop app has a microphone button, but at some point the recording will stop and beep. Maybe you notice, maybe you don’t. If your wifi hiccups, everything you said to that box is gone. So dictate into something that keeps your words, then paste. I currently use MacWhisper’s free version; for a while, the microphone button in Word did the job and I copy-pasted it over.
The three upgrades I’d add on day one. Everything I’ve done to my wiki since the paste is one move, repeated: notice something it could do better, describe it in plain language, and let it build the improvement itself. You don’t need to know how. It knows how. Start with these three:
- A “where was I?” page. One page the wiki keeps current: what’s in motion, what’s waiting on you, where you left off. You walk away, you come back, you ask “where was I?”, and it knows. Karpathy’s paste doesn’t include one. The idea came from Nate Herk’s video; mine got added on day one and I’ve never worked without it since.
- The save-everything rule. Nothing dies with the chat thread. Early on I asked “did you save that?” a hundred times a day. The fix is a rule, not vigilance: finished work gets written into the wiki’s files the moment it exists, and before you say goodbye, the session records what happened in the log.
- The harvest loop. Teach it once: when you say goodbye, the wiki reviews the session for what worked, what didn’t, your corrections, and new facts about you. It saves what matters back into itself. This is the piece that makes the system feel like it’s learning you, because it is.
All three ship in one file: three-starter-upgrades.txt. Drop it into your wiki and say: “Read this and build these three things.” Your wiki builds its own version, fitted to you. That’s the point.
Step 5: Use it
Use it like a chatbot that knows your files: talk with it, check whether it knows what you’ve fed it, then try the task you actually built this for.
When it does something you don’t like, say so: “Next time, do it this way.” “Remember this about me.” Tell it your expertise, how you work, what you want. Every time you work with it, you’re training it. You don’t think about that going in, but that’s what you’re doing.
And ask it about itself. How did you do that? Where did that information come from? Why this way? Test it with questions it should know the answers to. The more you learn about what it’s doing and why, the more empowered you are when you use it.
One more move I use all the time: point Claude at a page you trust and ask what’s worth learning there. You can do it with this site: “Read Julie’s build path and tell me what’s worth adopting for our wiki.” The rule stays the same as with downloads: you choose the sources, deliberately; it does the reading.
From here on, you do three things forever
An AI second brain is never finished. From here you do three things in any order, at your pace, forever: populate it, maintain it, connect it.
Populate
Tell Claude what you want it to know about you: who you are, how you work, your projects, what you’ve published, what you know. The more it knows, the less you explain.
- I talk to my AI all day. It never talks back. · dictation as the capture habit
- How I built an AI that actually knows my work · what feeding it looks like over months
- AI in Obsidian: how I actually use it · the reading window, day to day
Maintain and upgrade
You don’t have to know how to improve it. You just have to know what to ask for, and two habits do most of the work. The friction engine: whenever you catch yourself thinking “it’s so annoying that I have to do this thing over and over,” tell Claude exactly that. I have to do this over and over. How can you make it better? Together you set the job in stone so it runs the same way every time, and if you forget a step, Claude won’t. (These set-in-stone jobs have a name in Claude Code: skills.) And the health check Karpathy’s note calls linting: every so often, ask the wiki to check itself for contradictions between pages, stale claims, and orphan pages nothing links to. It finds its own rot and fixes it.
- How to give Claude lasting memory of your work · the first upgrade I’d make
- A skill is just a markdown file (and most of them are garbage) · teach it your repeatable jobs
- Claude Code subagents – the honest use case · when one Claude checks another’s work
- Your context window: compact vs. handoff · for when sessions get long
Connect
Connect it to things so it can act for you, carefully, and only when you want to. A research tool like Perplexity (teach it that AI search results might be wrong, so it brings you the sources). Your Notion, your Airtable. The Chrome extension, which can only drive the tabs you’ve explicitly shared. And know the rule before you connect anything: this is a powerful thing that writes code on your behalf, and an LLM can ask you for your password even though it’s not supposed to. Safe connecting is part of what I write about, and my real setup is public:
- What’s connected to my AI, what isn’t, and what died · the live catalog
- How I work with AI · my ground rules, in the open
One more thing, for the day you’re past the build: the blog page is sorted by exactly these moments – “it won’t remember me,” “how do I get my stuff into it,” “connect it safely,” “make it run better.” When something starts nagging you, start there.
Common questions
Is an AI second brain free?
The method is free and everything on this page is free. The AI behind it isn’t: Claude Code needs a paid Claude plan (Pro or up as I write this). Obsidian costs nothing.
Do I need Obsidian for this?
No. The wiki is plain files and runs fine without it; Obsidian is the free reading window that makes those files pleasant for a human to click through. I wouldn’t work without it, but the wiki doesn’t care.
Do I need a second brain app?
No, and that’s the point. An AI second brain is a folder of markdown files on your own computer. Any tool can read it, nothing expires, and you’re not renting your brain from anybody.
Is this the Karpathy LLM wiki?
Yes. The starting pattern is Andrej Karpathy’s LLM wiki idea from April 2026, and step 3 links his original text. This page is the non-programmer’s path to building it and living with it.
Is this “Building a Second Brain,” Tiago Forte’s method?
No, though they’re cousins. Building a Second Brain is Tiago Forte’s method for running your own notes (capture, organize, distill, express), and he now teaches AI-assisted versions of it too. This build starts from a different idea, Karpathy’s LLM wiki: an agent writes and maintains the files itself, and you direct it.
Will this still be useful in a year?
I don’t know, and I won’t pretend to. The AI space moves fast; in six months something could replace Claude Code or build all of this into the operating system. That possibility is exactly why the system is plain files: whatever tool comes next reads the same folder. The wiki outlives the tool. So does the skill you’ve built by then: thinking about your work in steps and procedures instead of just doing it, and knowing how to work with an AI.
The newsletter
The build path grows
New posts and files land in the strands above as I build them into my own system. Subscribers hear first. A letter every week or so, no hype.
Double opt-in · unsubscribe anytime · GDPR-compliant